Demo & Showcase
Goal
This tutorial will let you run and play with a Kabaret standalone application.
Prerequisites
For this tutorial we assume you have installed kabaret in either options described here.
Kabaret uses various functionalities of redis and we will use a local redis-server to continue. You can download one from this page (windows users can download here) and start a server with the default configuration. We will assume it is available at localhost on port 6379.
Preparation
Kabaret is not an application but a framework and it is up to the user to build his very own tools. The convention is to package this code into a “studio” python package, as it will contain everything your studio will need. Before learning how to do this in next tutorials, we will have a look at what kabaret looks like for the end user.
In order to do so, we will run the ‘dev_studio’ that our developers use to test and showcase their functionalities. This python package installs itself when you install kabaret so you should already be able to import both packages:
1 2 | import kabaret
import dev_studio
|
Now run python with the following command line options:
python -m dev_studio.gui --cluster KABARET_DEMO --session KabaretDemo
Note
If you need to connect to a remote redis store, you can use –db, –host and –password. You can also use -h at the end of the command line to list all available options.
You should see a Kabaret window like this:
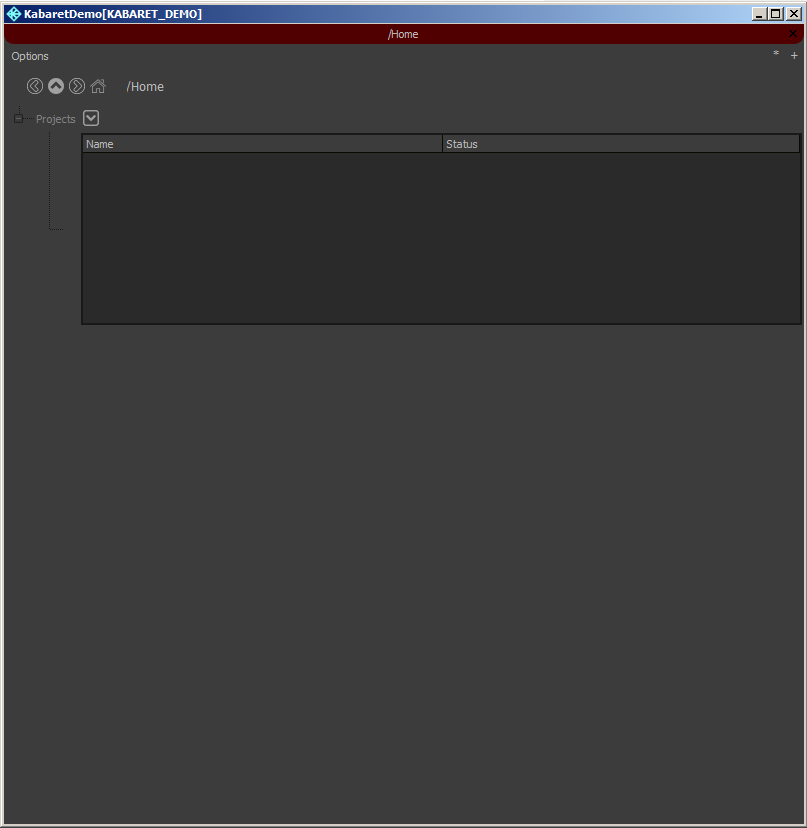
Your very first encounter with Kabaret GUI \o/
Let’s play !
Bravo, you have just run your first kabaret application \o/
This window is Kabaret’s default standalone with the default look and style, showing the default view: a project explorer. There is not much to see yet so we will create a project to browse.
Locate the button on the right of the “Projects” field. It contains the actions you can perform on the list of available projects. Left click it, and select “Create Project”
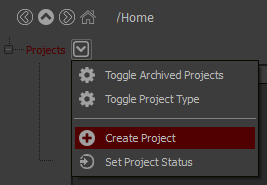
A dialog will appear, with a field for the Project Name and another one for the Project Type. You can leave default values and click the “Create Project” button.
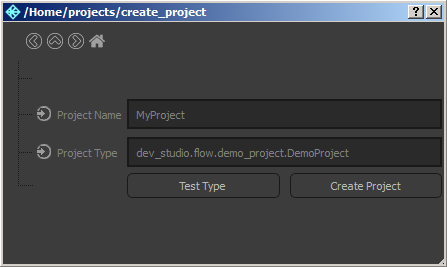
You will now see the “MyProject” entry in the Projects table. Double click on it to open it and have fun :p
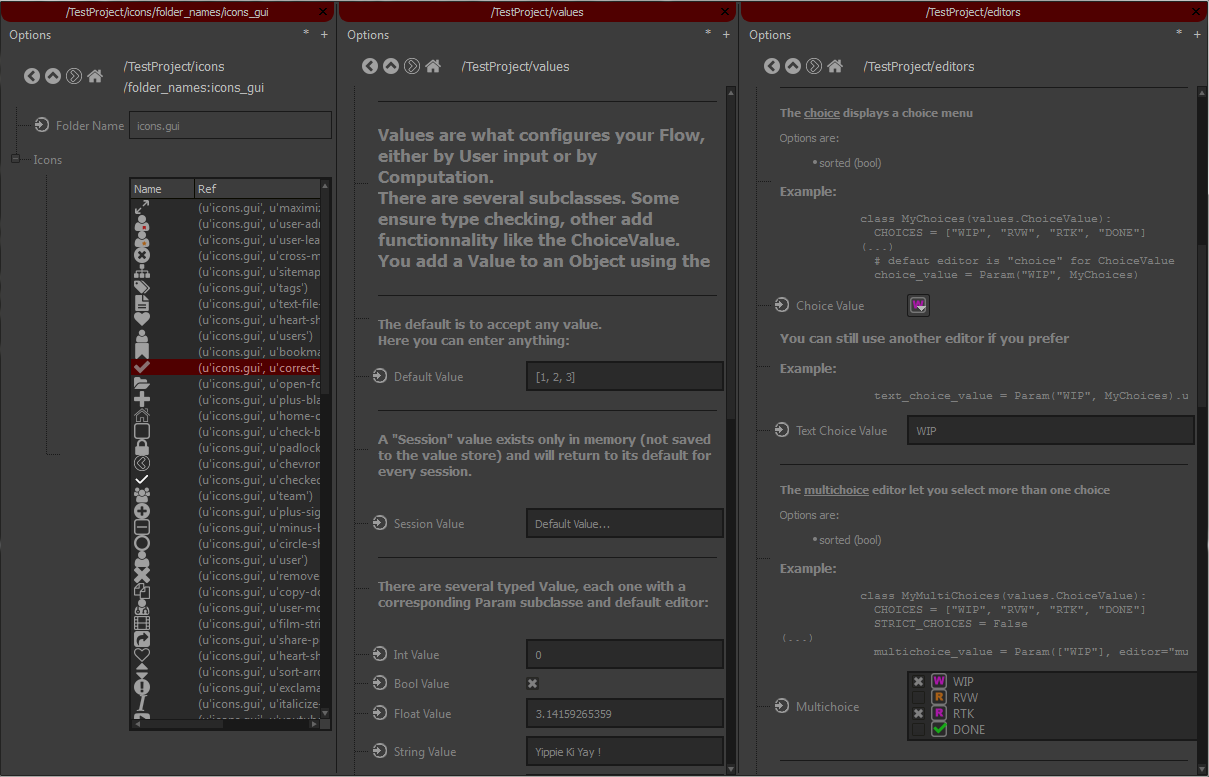
- Take some time to familiarize yourself with navigation:
- Click the [+] sign on the left of a label, or double click when the label is highlighted to expand it.
- Double click on a label to enter it.
- Double click with the Control key pressed to open in another view (you can rearrange view using drag&drop)
- Use the navigation button at the top-left of the view (use the Home button to go back to the project list)
- Use the navigation address at the top of the view (left or right click on different sections)
- Resize stuff with the middle mouse button.
- …
- You should discover basic possibilities of kabaret GUI:
- Groups
- Action Menus, Actions Buttons, Action Dialogs
- Maps (tables/list)
- Parameter fields with various editors (text, boolean, date, etc.)
- Summaries
- Drag’n’drop
- …
Everything you see here has been defined by the dev_studio.flow.demo_project module.
This project is just a dummy non-functional mockup, but you can challenge yourself into creating a Film and some Shots. Maybe even an asset that you could drag’n’drop into a shot casting…
Note
It you accidentally closed all views, you can right click anywhere and select one of the available views.
Conclusion
We’ve seen just the tip of the iceberg here, but it hopefully made you want to discover more.
If you’re python fluent, you can watch the content of the dev_studio/flow/demo_project.py file (start your journey at the end with the DemoProject class definition). You may also want to create a second project with the type ‘dev_studio.flow.unittest_project.UnittestProject’, it is full of interesting inline comments about the kabaret.flow usage…
Here is a sample of what you can find in the UnittestProject
Or just browse to the next tutorials where we will setup your own studio and create a simple project ! :)